Educational content only — not medical advice. See our full Medical Disclaimer and Affiliate Disclosure below.
Key Takeaways
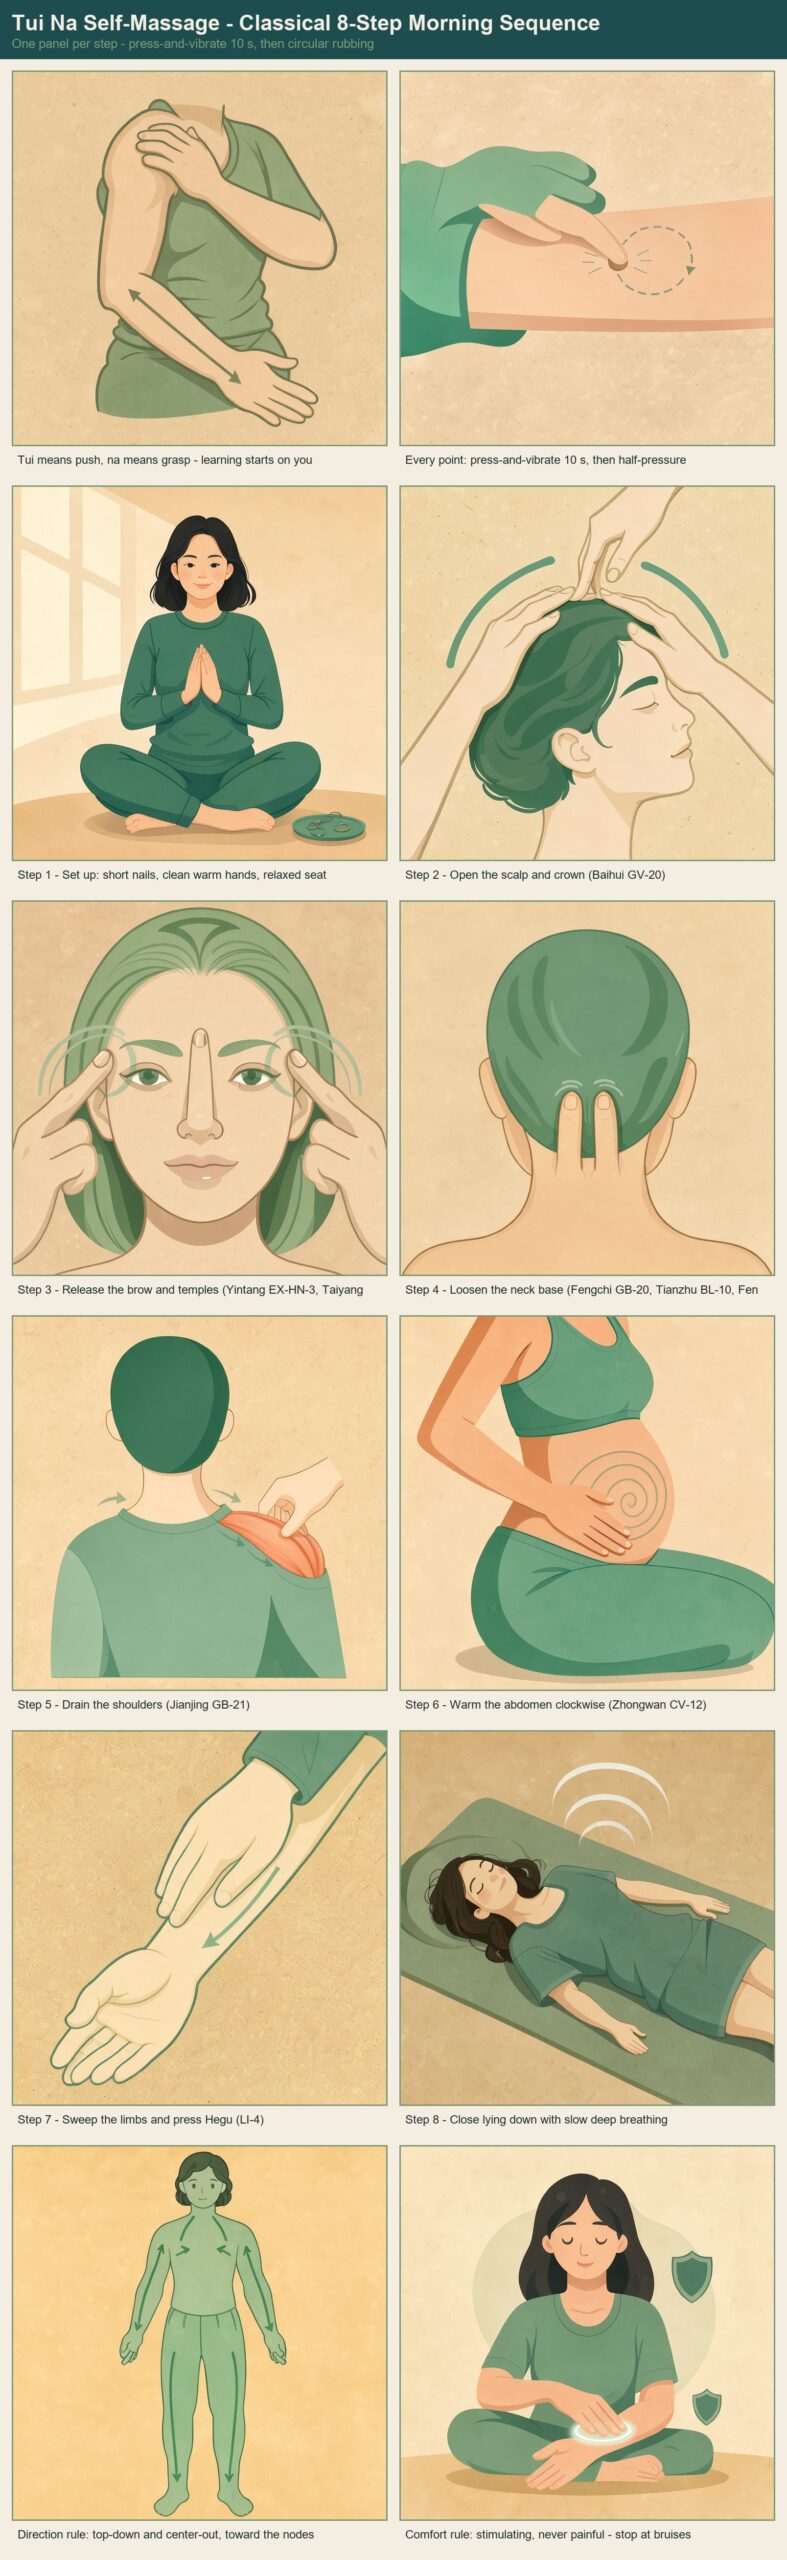
- Tui na self-massage is the classical entry into China’s traditional massage: tui means “push,” na means “grab,” and the tradition’s own training rule says the first step of learning massage is massaging yourself.[1]
- The full morning protocol runs through eight stations from scalp to feet and takes about twenty minutes; every other day is the accepted compromise when time is short.[1]
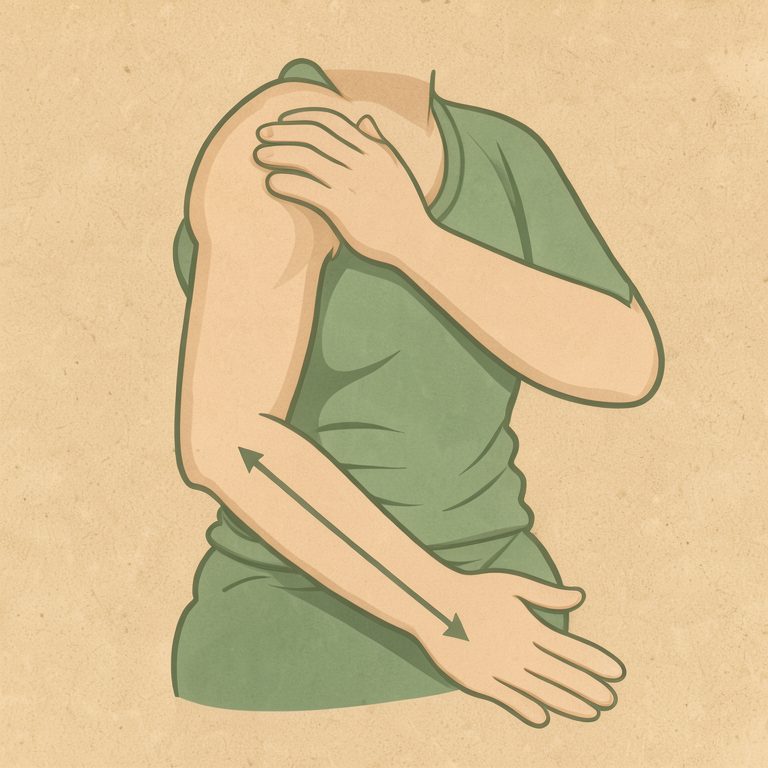
- Every point follows one two-part pattern — press-and-vibrate for about ten seconds, rest a few seconds, repeat, then circular rubbing at about half the pressure.[1]
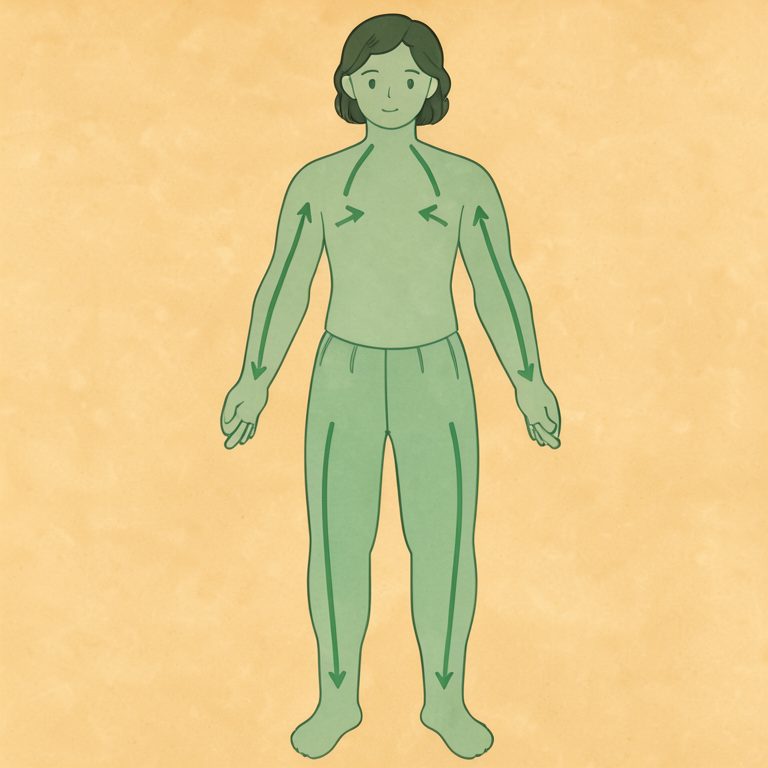
- The general massage literature adds modern safety rules: strokes run along the lymph-flow lines toward (never onto) the lymph nodes, dry work on one area is capped at 2–3 minutes, and pressure must never leave bruise-colored spots.[4][5]
- This is an educational wellness routine, not medical treatment: professional tui na traditionally takes about ten years of training, so injuries and medical conditions belong with a qualified practitioner.[1]
Tui na self-massage is where classical Chinese massage begins: before a student ever works on another body, the source tradition trains the hands on the one body always available — your own. This manual assembles the beginner sequence exactly as the source literature lays it out: eight steps, about twenty minutes, no equipment, with the timing rules, direction rules, and safety limits the books are explicit about. For more guides in the same spirit, browse our library of practice manuals.
What Tui Na Self-Massage Is — and Why It Starts With Your Own Hands
Tui na is the traditional massage of China built on two gestures: tui means “push” and na means “grab,” so tui na is the massage focused on pushing and grasping techniques.[1] Historically, Chinese physicians used it to reduce pain, improve the circulation of qi and blood, and relieve mental tension, and over time it also became an established method for the care of small children.[2] Its partner technique is dian xue — “pointing at cavities,” known in the West as acupressure — pressing specific acupuncture cavities to influence qi circulation in the twelve primary channels.[1]
Here is the encouraging part for a beginner: although a professional tui na practitioner traditionally needed about ten years of training and command of roughly 108 of the body’s more than seven hundred cavities, the source literature is explicit that many cavities and techniques for basic health maintenance do not require long-term professional training.[1] The classical way in is self-massage: “To learn massage, the first step is self-massage.”[1] This manual is educational — a traditional wellness practice, not intended to cure, treat, or diagnose any disease.
Qi Language vs. What the Massage Books Describe
Two registers get blended in most tui na content online. The traditional register speaks of qi, cavities, and stagnation;[1][2] the general massage literature in our library describes the very same strokes in the language of modern physiology — nerves, lymph, and circulation.[4][5] The table keeps them apart so you always know which kind of claim you are reading.
| Angle | Traditional tui na framing | What the massage literature describes |
|---|---|---|
| Core strokes | Push (tui) and grasp (na), plus cavity press (dian xue) with fingertip pressure[1] | A classic self-massage sequence moves through stroking, squeezing, rubbing, active and passive movements, kneading, shaking, and percussion[5] |
| Why it is said to work | Cavity press regulates qi circulation in the twelve primary channels; circular rubbing draws stagnant qi to the surface and spreads it[1] | Surface stroking is described as calming, and work on clusters of nerve endings is said to lower nervous excitability; strokes are guided along the lymph-flow lines toward the nearest lymph nodes[4][5] |
| Direction | Push from the top of the body downward and from the center outward — from the torso along the limbs this is the “releasing” direction that leads qi away[1][4] | All movements follow the lymphatic paths toward the nearest nodes — toward the elbow and armpit on the arms, the knee and groin on the legs — and the nodes themselves are never massaged[4][5] |
| Dose | About twenty minutes for a full session; every other day if time is short[1] | Dry work on a single area is capped at 2–3 minutes to protect the skin[5] |
| Heritage | Qigong massage is described in the qigong literature as resting on more than five thousand years of experience;[6] Chinese massage was shaped by doctors, martial artists, clergy, and folk masseurs[2] | The same classical order of techniques has been taught in self-massage manuals for decades[5] |
The 8-Step Morning Protocol
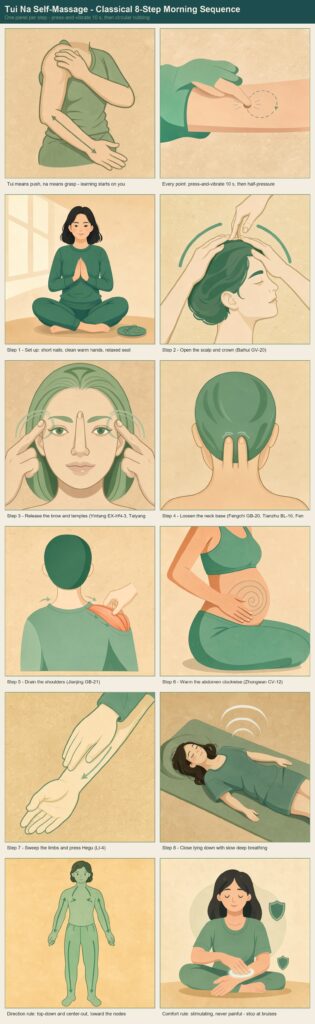
The protocol below follows the classical order of the source chapter — head and neck first, then the front torso, then the limbs — condensed into the eight moves that matter most for a daily routine.[1] The best time to practice is right after waking, while qi circulation is slowest after sleep; the second-best time is right before bed, to open the channels that went stagnant through the day.[1] Every point uses the same two-part pattern: press-and-vibrate for about ten seconds, rest a few seconds, repeat once or twice, then circular rubbing for about ten seconds at roughly half the pressure.[1]
Set up your hands and position
Trim your fingernails short — fingertips do most of the cavity work in tui na self-massage [1]. Wash the hands, remove rings and bracelets, and ventilate the room before you start [5]. Choose a position that lets the massaged muscles relax completely: full relaxation is called the key to successful self-massage [4][5].Open the scalp and crown (Baihui GV-20)
Place both palms on the scalp and make gentle circles, then press the skin with the finger pads — not the nails — and vibrate softly, working from the center out toward the sides [1]. Finish the head by pressing the crown point baihui (GV-20) with the index and middle fingers for ten seconds, then gentle circles ten times in each direction [1].Release the brow and temples (Yintang EX-HN-3, Taiyang EX-HN-5)
Press and vibrate yintang (EX-HN-3), the "third eye" between the eyebrows, for ten seconds [1]. Then rub the taiyang temple points with the index and middle fingers in slow circles moving up, back, down, and around — the direction the source uses for releasing; the book warns that reversed circles lead qi upward and can worsen head tension [1]. The temples are among the most commonly massaged points for headache in the tradition [1][3].Loosen the neck — very gently (Fengchi GB-20, Tianzhu BL-10, Fengfu GV-16)
Rub the back of the neck gently from hand to hand without lifting the head, which would only add tension [1]. Then press-and-vibrate three points at the base of the skull — tianzhu (BL-10), fengchi (GB-20), and fengfu (GV-16) — ten seconds each, followed by ten seconds of circular rubbing [1]. Fengchi is traditionally listed for headache, stiff neck, common cold and flu, insomnia, and dizziness [1], and a Chinese self-massage recipe for neck pain works the same points with gentle palm rubbing of the whole neck [3].Drain the shoulders (Jianjing GB-21)
With the right-hand fingers, push the thick tendon from the neck out along the left shoulder ten times, then grab and rub the tendon, and finally press-and-vibrate jianjing (GB-21) — located by pinching the shoulder muscle between thumb and middle finger — for ten seconds [1]. Repeat on the other side. This is the step the source uses to lead the qi away from the head and neck, and massaging here is traditionally said to ease tension of the head and neck [1].Warm the abdomen clockwise (Zhongwan CV-12)
Overlap the palms and circle the entire abdomen ten times clockwise, the direction of the bowel [1]. The source warns that circling in reverse works against this releasing direction and may lead to constipation [1]. Optionally add zhongwan (CV-12) on the midline above the navel with the same press-vibrate-then-circle pattern used elsewhere in the sequence [1].Sweep the limbs and press Hegu (LI-4)
Push with the palm from the upper arm down to the hand and from the thigh down to the foot, moving from the torso outward — the outer (yang) sides of the limbs take firmer pressure, the inner (yin) sides stay gentle [1]. Finish with hegu (LI-4) in the web between thumb and index finger: press with the thumb, leverage with the other fingers, vibrate for ten seconds [1]. Hegu is one of the three cavities the tradition names most important for health and longevity, alongside zusanli (ST-36) and sanyinjiao (SP-6) [1].Close with stillness and slow breathing
Lie down comfortably, keep the body as relaxed as possible, and breathe deeply and slowly for a few minutes so the stimulated areas settle — this is the closing step of the classical sequence [1]. If you practice right before sleep, the book says, simply let yourself fall asleep [1].
- Set up your hands and position. Trim your fingernails short — fingertips do most of the cavity work in tui na self-massage.[1] Wash the hands, remove rings and bracelets, and ventilate the room before you start.[5] Choose a position that lets the massaged muscles relax completely: full relaxation is called the key to successful self-massage.[4][5]
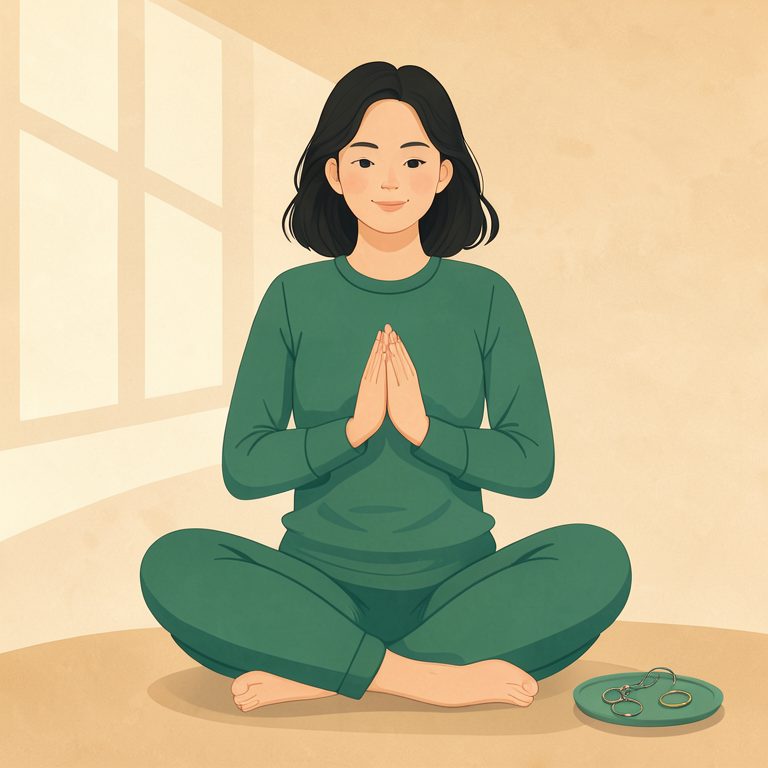
Step 1 — short nails, clean warm hands, jewelry off, a relaxed seat - Open the scalp and crown. Place both palms on the scalp and make gentle circles, then press the skin with the finger pads — not the nails — and vibrate softly, working from the center out toward the sides.[1] Finish the head by pressing the crown point baihui (GV-20) with the index and middle fingers for ten seconds, then gentle circles ten times in each direction.[1]
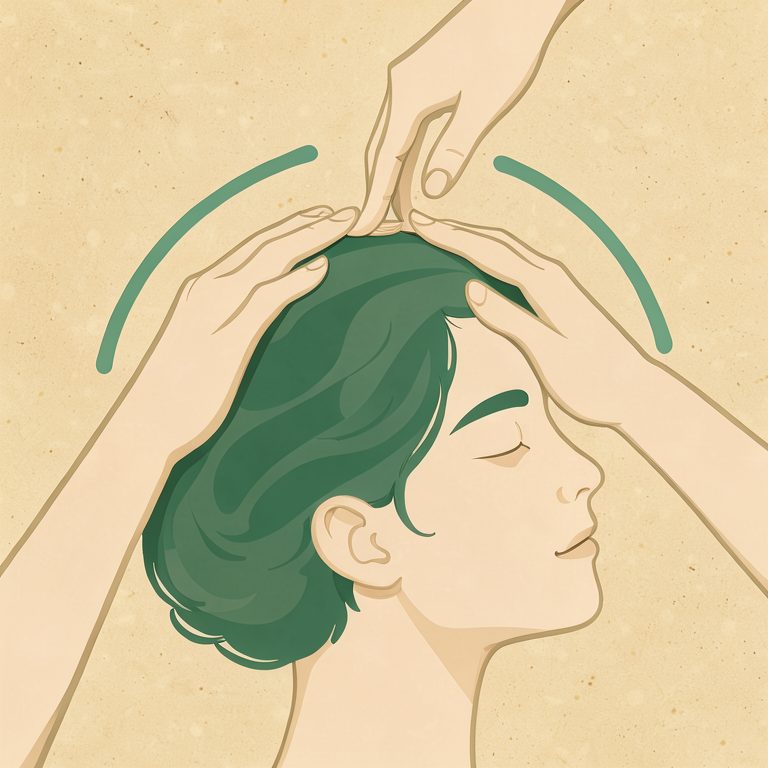
Step 2 — palm circles over the scalp, then press baihui (GV-20) on the crown - Release the brow and temples. Press and vibrate yintang (EX-HN-3), the “third eye” between the eyebrows, for ten seconds.[1] Then rub the taiyang temple points with the index and middle fingers in slow circles moving up, back, down, and around — the direction the source uses for releasing; the book warns that reversed circles lead qi upward and can make headache or head tension worse.[1] The temples are named the most common cavities for massage when you have a headache.[1]
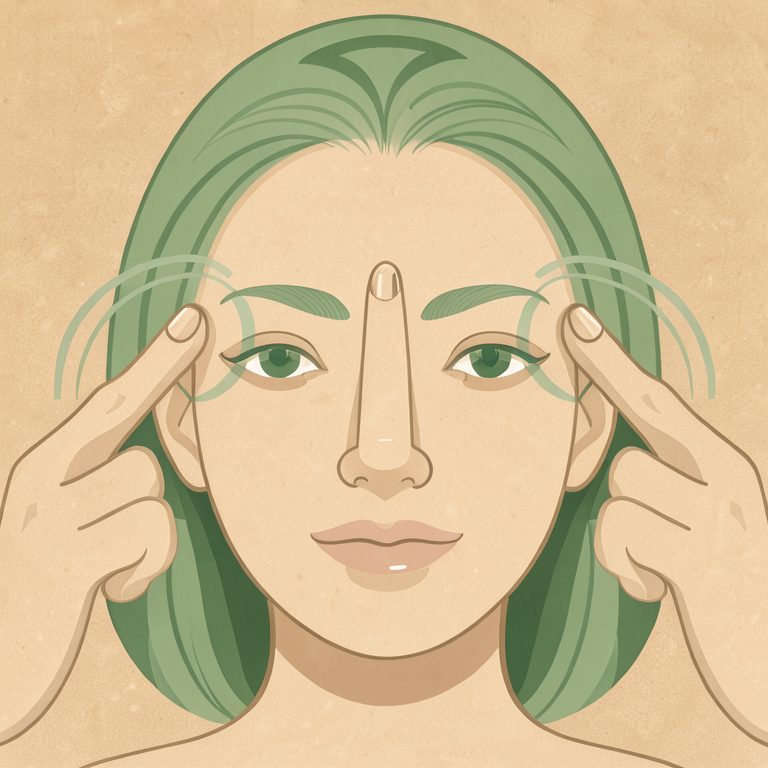
Step 3 — yintang between the brows, then slow temple circles up, back, and down - Loosen the neck — very gently. Rub the back of the neck gently from hand to hand without lifting the head, which would only add tension.[1] Then press-and-vibrate three points at the base of the skull — tianzhu (BL-10), fengchi (GB-20), and fengfu (GV-16) — ten seconds each, followed by ten seconds of circular rubbing.[1] Fengchi is traditionally listed for headache, stiff neck, common cold and flu, insomnia, and dizziness,[1] and a Chinese self-massage recipe for neck pain works the same points after gently rubbing the whole neck with the palms.[3]
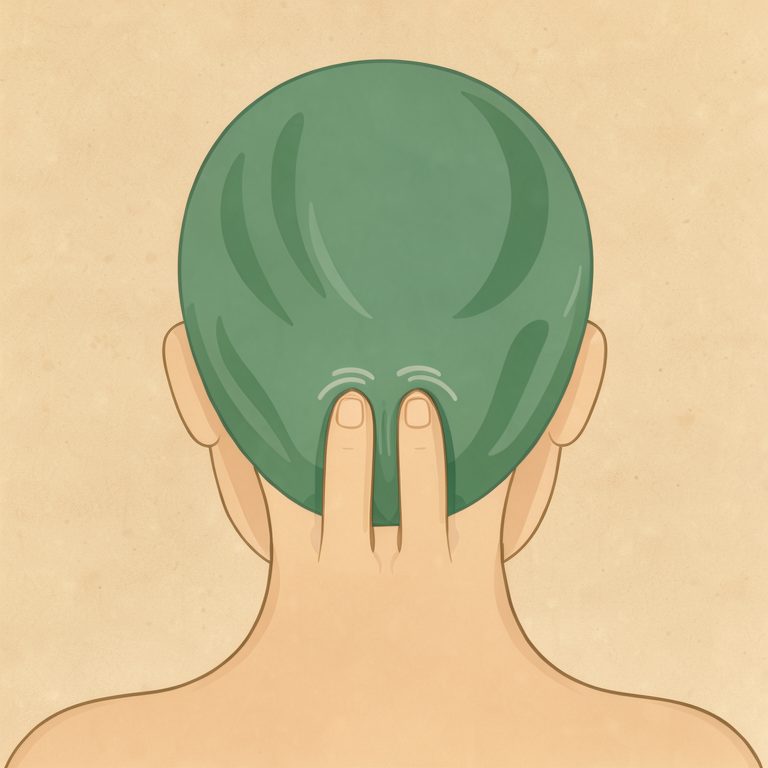
Step 4 — head level, fingertips into the skull-base hollow: fengchi, tianzhu, fengfu - Drain the shoulders. With the right-hand fingers, push the thick tendon from the neck out along the left shoulder ten times, then grab and rub the tendon from the neck to the shoulder.[1] Finally press-and-vibrate jianjing (GB-21) — located by pinching the shoulder muscle between thumb and middle finger — for ten seconds, and repeat on the other side.[1] This is the step the source uses to lead the qi away from the head and neck, and massaging here is traditionally said to ease tension of the head and neck.[1]
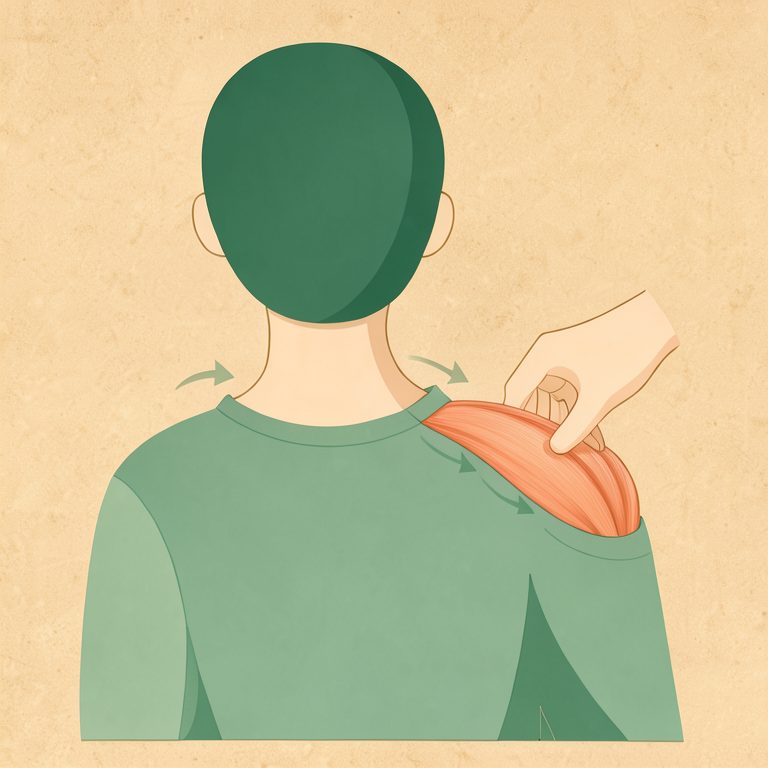
Step 5 — push the shoulder tendon out from the neck, then pinch jianjing (GB-21) - Warm the abdomen clockwise. Overlap the palms and circle the entire abdomen ten times clockwise, the direction of the bowel.[1] The source warns that circling in reverse is not releasing but nourishing, and may lead to constipation.[1] Optionally add zhongwan (CV-12) on the midline above the navel with the same press-vibrate-then-circle pattern used elsewhere in the sequence.[1]
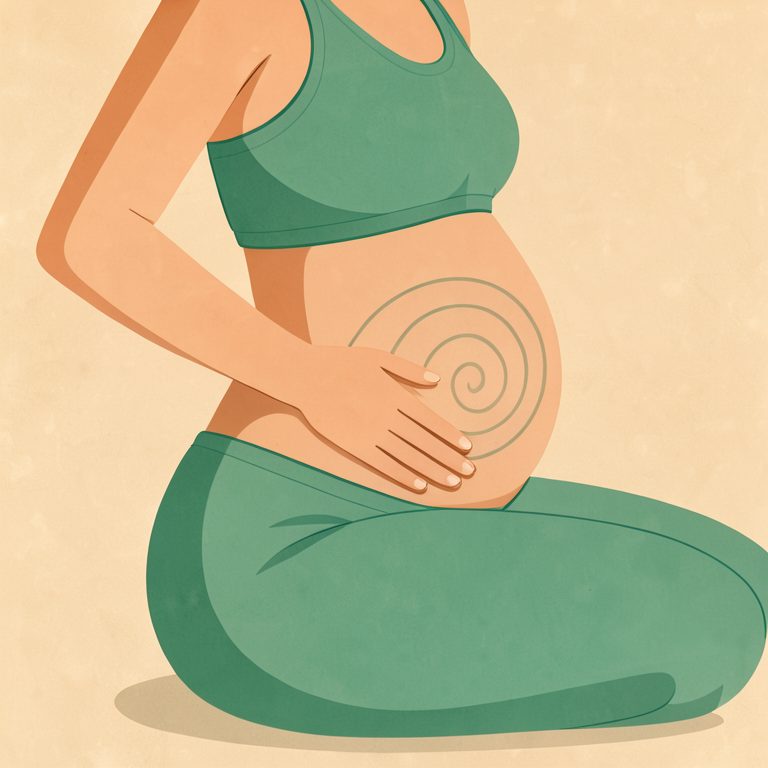
Step 6 — overlapped palms circling the abdomen clockwise, the direction of the bowel - Sweep the limbs and press Hegu. Push with the palm from the upper arm down to the hand and from the thigh down to the foot, moving from the torso outward — the outer (yang) sides of the limbs take firmer pressure, the inner (yin) sides stay gentle and soft.[1] Finish with hegu (LI-4) in the web between thumb and index finger: press with the thumb, leverage with the other fingers, vibrate for ten seconds.[1] Hegu is one of the three cavities the tradition names most important for health and longevity, alongside zusanli (ST-36) and sanyinjiao (SP-6).[1]
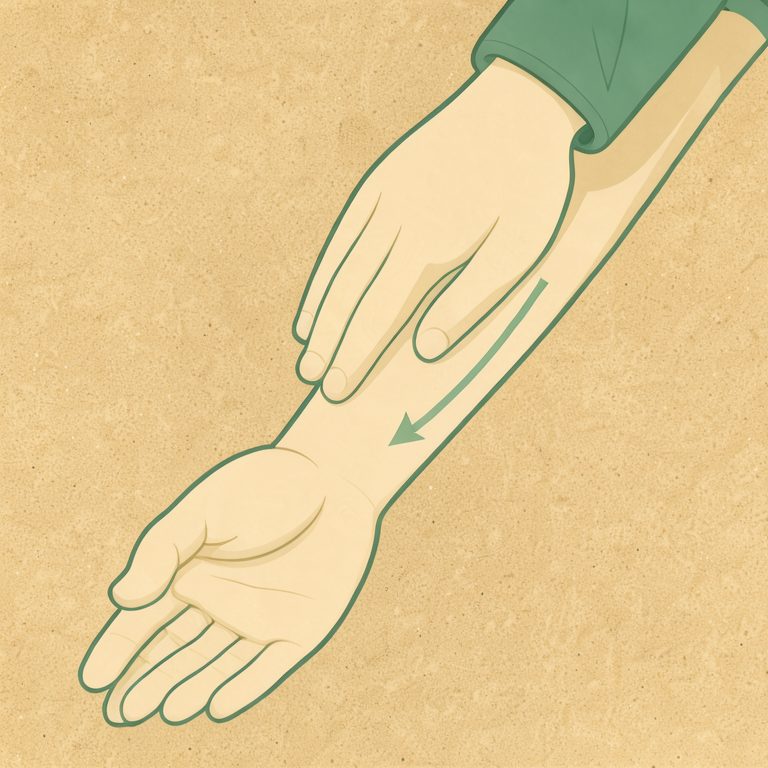
Step 7 — sweep the limbs outward from the torso, finish with hegu (LI-4) in the thumb web - Close with stillness and slow breathing. Lie down comfortably with a calm mind, keep the body as relaxed as possible, and breathe deeply and slowly for a few minutes so the stimulated areas settle — this is the closing step of the classical sequence.[1] If you practice right before sleep, the book says, you may simply let yourself fall asleep.[1]
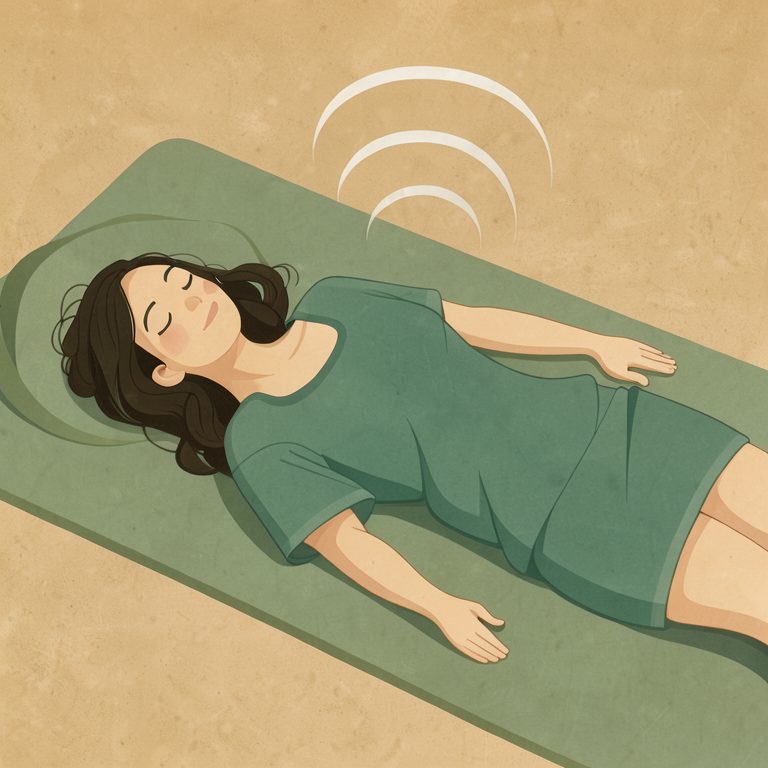
Step 8 — lie down and let slow deep breathing settle the whole sequence
Timing, Direction, and Dose
A full-body session takes about twenty minutes, and practicing every other day is an accepted compromise when time is short.[1] Chinese self-massage recipes aimed at a specific complaint — low energy, blood-pressure care — schedule two shorter sessions, morning and evening.[3] Keep every pushing stroke moving from the top of the body downward and from the center outward — the direction both the tui na source and the eastern-massage manuals describe as releasing.[1][4] Judge your pressure by feel: a comfortable, stimulating sensation is the goal, while pain strong enough to make you tense works against the release you are after.[1] One further rule from the general literature: no technique should cause sharp pain or leave blue or purple spots on the skin.[5]
Safety and Contraindications
Self-massage here is a wellness practice, and the sources draw the professional line clearly: treatment-level tui na traditionally takes about ten years of training, so injuries and medical conditions belong with a qualified practitioner, not with this routine.[1] This manual is not intended to cure, treat, or diagnose any disease. Within the routine itself:
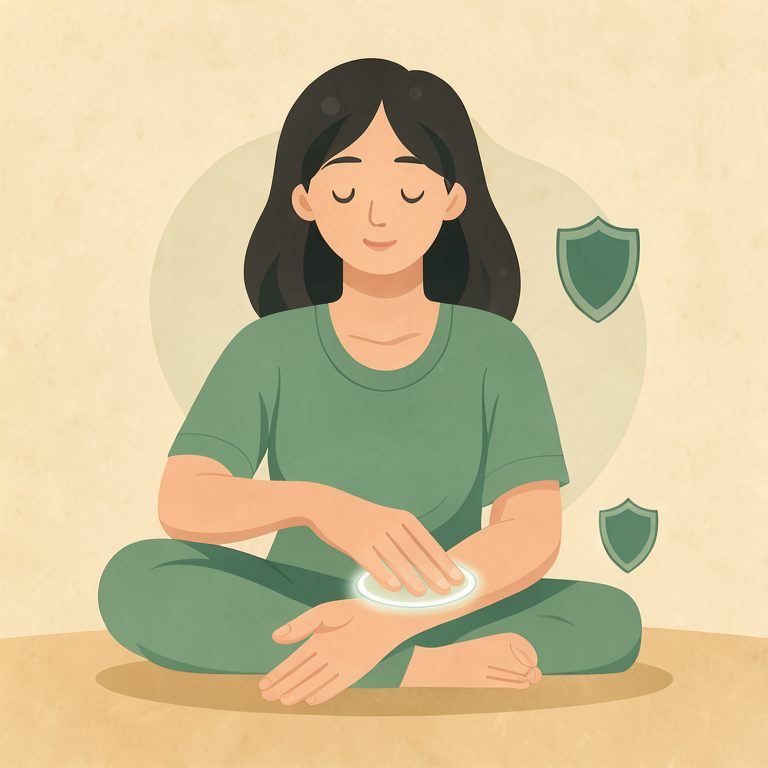
- Comfort rule. Pressure stays at a comfortable, stimulating level; sharp pain or bruise-colored spots mean stop.[1][5]
- Never press lymph nodes. Strokes move toward the nearest nodes — elbow, armpit, knee, groin — but the nodes themselves are never massaged.[4][5]
- Time cap per area. Dry work on one area is limited to 2–3 minutes to avoid skin damage.[5]
- Be gentle on the neck. The source insists on gentle neck rubbing and on keeping the head level, never lifted.[1]
- Clean skin, clean hands, no jewelry. Work on a washed body with washed hands, rings and bracelets off, in a ventilated room.[5]
- Skip damaged skin. Do not work over irritated or broken skin or during acute inflammatory conditions; if in doubt about any condition, consult a qualified professional first.[5]
Frequently Asked Questions
How long does a full session take?
About twenty minutes for the complete eight-step sequence; the source accepts every other day when daily practice does not fit your schedule.[1] Complaint-focused Chinese self-massage recipes are shorter but run twice a day, morning and evening.[3]
How hard should I press the points?
Press-and-vibrate at a comfortable, stimulating level for about ten seconds, then switch to circular rubbing at about half that pressure.[1] Sharp pain, tensing up, or blue and purple spots on the skin are signals to stop or lighten up — never goals.[1][5]
When is the best time to practice?
Right after waking: the source explains that qi circulation slows down during sleep, and early-morning massage re-energizes it.[1] The second-best window is right before bed, to open channels stagnant from the day — and if you get sleepy, the book explicitly allows falling asleep.[1]
Sources
- [1] Yang Jwing-Ming — Meridian Qigong Exercises: Combining Qigong, Yoga, Acupressure (2016)
- [2] Yang Jwing-Ming (Tszyunmin Ya. in the Russian edition) — Chinese Qigong Massage: General Massage (Kitayskiy Tsigun-Massazh. Obshchiy Massazh; 2000, Russian edition)
- [3] Unknown Author — Chinese Self-Massage (Kitayskiy Samomassazh; Russian edition)
- [4] Lao Min — Techniques and Methods of Eastern Massage (Tekhniki i Priemy Vostochnogo Massazha; 2022, Russian edition)
- [5] Biryukov A. A. — Self-Massage: A Source of Vigor, Strength, and Health (Samomassazh: Istochnik Bodrosti, Sil, Zdorovya; 1972, Russian edition)
- [6] Razhev Yu. A. — Qigong Massage for Life Extension (Tsigun-Massazh dlya Prodleniya Zhizni; 2013, Russian edition)
How we researched this
This manual is drawn from our local research library of 1,137 traditional wellness books — no internet sources were used at any stage. Every factual statement above was checked against the cited passages of the source books before publishing.
Keep Exploring
This manual is part of our growing practice library — browse all step-by-step guides on the manuals page. If your goal is joint comfort or hip mobility rather than daily maintenance, read our honest Joint Genesis review and Unlock Your Hip Flexors review before considering any paid program.
Sources & References
Yang Jwing-Ming - Meridian Qigong Exercises: Combining Qigong, Yoga, Acupressure (2016); Yang Jwing-Ming (Tszyunmin Ya. in the Russian edition) - Chinese Qigong Massage: General Massage (Kitayskiy Tsigun-Massazh; 2000, Russian edition); Unknown Author - Chinese Self-Massage (Kitayskiy Samomassazh; Russian edition); Lao Min - Techniques and Methods of Eastern Massage (Tekhniki i Priemy Vostochnogo Massazha; 2022, Russian edition); Biryukov A. A. - Self-Massage: A Source of Vigor, Strength, and Health (Samomassazh: Istochnik Bodrosti, Sil, Zdorovya; 1972, Russian edition); Razhev Yu. A. - Qigong Massage for Life Extension (Tsigun-Massazh dlya Prodleniya Zhizni; 2013, Russian edition)