
Educational content only — not medical advice. See our full Medical Disclaimer and Affiliate Disclosure below.
Ear seeds now show up all over wellness content, and shopping for the best ear seeds in 2026 means comparing kit after kit that looks identical at first glance: a card of seeds, a strip of tape, maybe a small chart. This buyer’s guide takes a different route. Instead of ranking brands, it rebuilds every buying decision from the practice rules that auriculotherapy and seed-therapy textbooks actually teach — which material, which tape, how long to wear, what belongs in the box, and who should skip the method entirely. By the end, you will know how to judge any acupressure ear seed kit against documented criteria rather than marketing copy.
Key Takeaways
- Ear seeds are applicators, not jewelry: small natural seeds or metal and magnetic pellets taped over reflex points of the auricle so that gentle pressure on a point continues for hours[1].
- The material sets the wear window: natural seeds may stay on up to 24 hours, while magnetic stars carry stricter case-based limits of hours per day[1][2].
- A useful ear seeds kit includes a labeled zone chart, a probe, and paper-based tape with spare strips — the contents the practice rules assume you have[1][3].
- Safety filters are non-negotiable: irritant or allergenic materials, broken or irritated skin, fever, eczema, and the second half of pregnancy all rule the method out[1][3][6].
What Are Acupressure Ear Seeds?
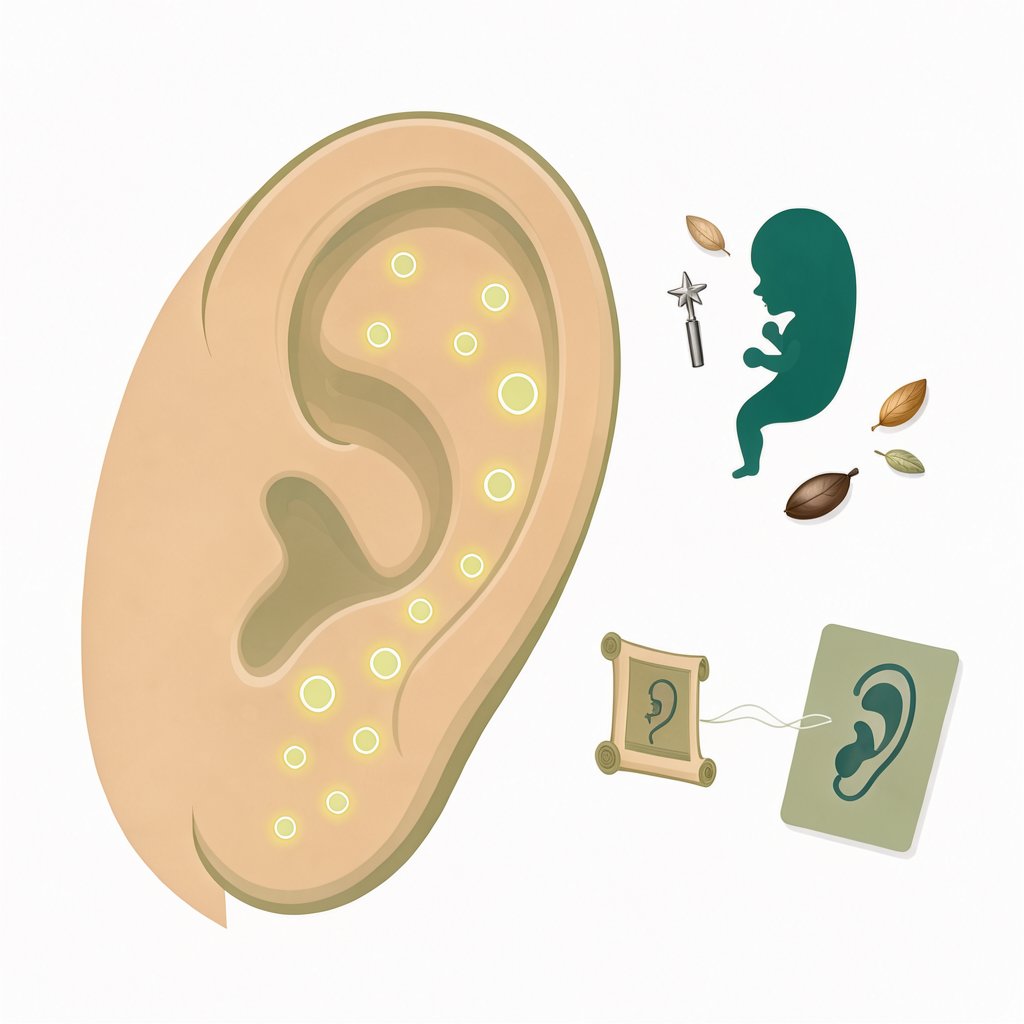
Acupressure ear seeds are small applicators — natural plant seeds, or metal and magnetic pellets — fixed onto adhesive tape and placed over reflex points of the outer ear, called the auricle. The point of the device is prolonged stimulation: gentle pressure on a chosen zone continues for hours while you do other things. Everything a kit contains exists to support that one job, which is why “seed” here means a pressure applicator, never a piece of jewelry[1].
The lineage behind the method is older than any kit on the market. The seed-therapy literature references care by points of the auricle as an ancient practice, and credits the French physician Dr. Nogier with the observation that set up the modern method: the similarity he noticed between the shape of the ear and a human embryo was consciously used to search for therapeutic points and contributed to the further development of acupuncture on the auricle[1]. Earlier still, the critical history of acupuncture records how Louis Berlioz — father of the famous composer — reinterpreted acupuncture through electricity and nerves in the early nineteenth century, opening the debate over mechanism that continues to this day[5].
One honesty note before the criteria. Every selection rule in this guide comes from practice textbooks: which materials the tradition chooses, how applicators are taped, how long they stay on the skin, which tools matter, and who must not use the method. The books cannot rank commercial kits for you, and this guide does not pretend otherwise. What they can do is hand you a checklist that any product page has to survive — which is exactly how the five criteria below are built.
How Ear Seeding Is Claimed to Work: Vagus, Points, and the Evidence
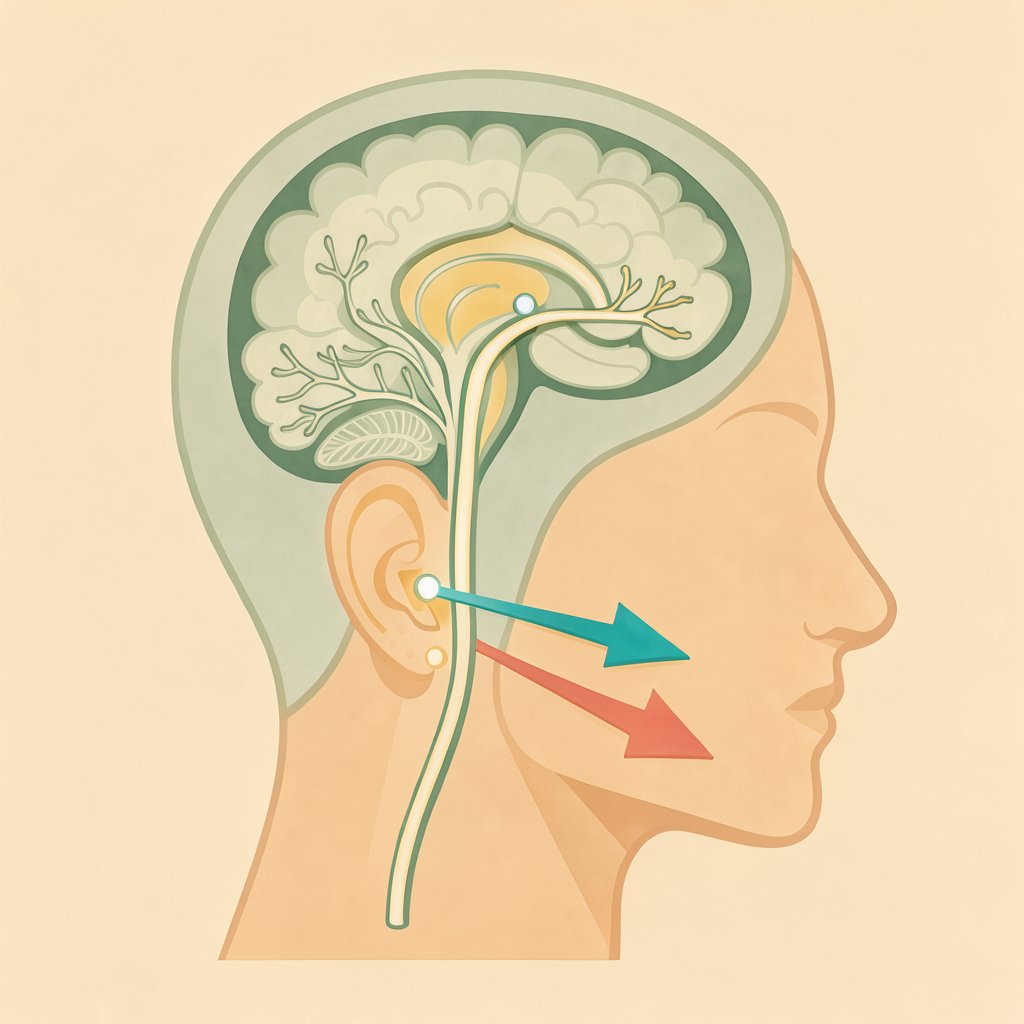
Why the ear at all? The auriculotherapy literature describes the auricle as a microsystem: more than 100 active points, each only about 1 mm² wide, treated as projection zones of the body rather than isolated dots[3]. The same texts add the diagnostic sign the tradition relies on — a zone is painless in health and becomes painful in illness, with flaking and redness appearing over points in chronic conditions[3]. That tenderness map is what a probe and a chart are meant to read.
Underneath part of the story sits real anatomy. The auricular branch is the first branch of the vagus nerve, and it reaches the skin of each ear — the outer canal, the tragus, and the concha[4]. A modern vagus-nerve guide names ear acupuncture, where points in the ear are used, as the main activation point for vagal work, and notes that only about 20% of vagus fibers are efferent while roughly 80% carry sensory signals inward[4]. That book’s extracted text is a partial, rough machine translation, so its claims are kept modest here; the branch anatomy itself matches standard physiology.
How much of the benefit is settled science? Less than marketing suggests. The critical history lists three standing explanations for acupuncture-style analgesia — the gate-control theory of Melzack and Wall from the mid-1960s, endorphin release, and plain placebo attribution — and reports that reliable supporting data are lacking for each[5]. The tradition, for its part, frames seeds as “living biological structures” whose fields interact with correspondence zones; that is the school’s belief statement, not established physiology, and this guide presents it exactly that way[1].
Criterion 1 — Material: Natural Seeds vs Metal and Magnetic Stars
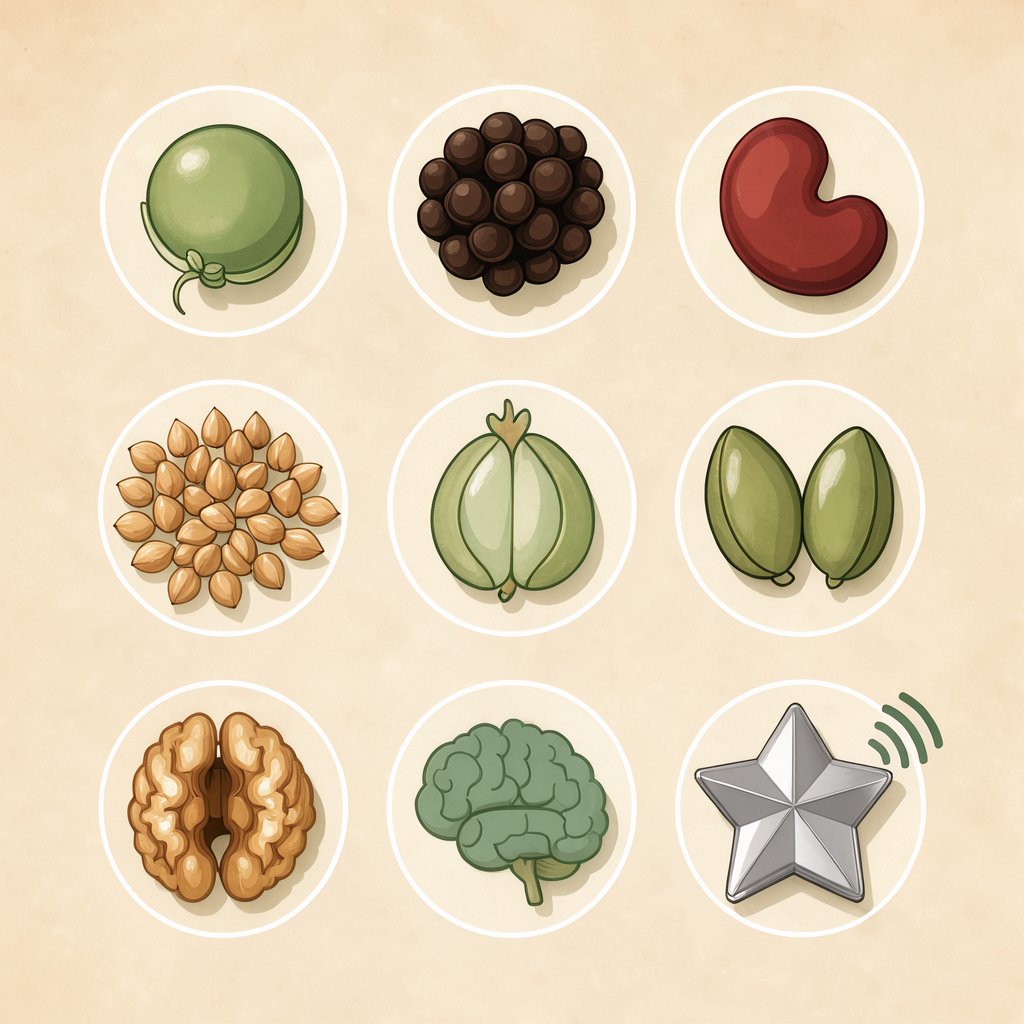
The first spec on any kit label is the applicator material, and the source tradition is unusually concrete about it. Natural seeds are chosen by a shape rule: round seeds — pea, black pepper — for eye complaints; bean seeds for the kidneys; viburnum, buckwheat, and pumpkin seeds for the heart; grape seeds for the pancreas; and a walnut as a massage tool for the brain, because its halves resemble the brain’s hemispheres[1]. For larger correspondence zones the books list date pits, acorns, small chestnuts, hazelnuts, alder cones, wheat ears, cherry pits, corn seeds, and pine nuts[1].
The case records show these materials in daily use. One child’s adenoid case used black peppercorns applied daily on correspondence points, and an eye-inflammation case used an apple seed for a one-hour stimulation that the book reports resolving within a day[1]. Read those as traditional case reports — illustrations of the school’s dosage thinking — not as outcome promises.
The second material class behaves differently. Metal and magnetic stimulators — stars — carry their own stricter wear windows: a bedwetting case wore magnetic stars three hours a day for three days, then switched to grains overnight[1]; sixteen hours of continuous wear appears only as an inpatient case in the lecture course[2]; and a boil case left a star in place “for constant stimulation,” checked the next day[2]. The buyer’s takeaway is simple: the material class sets the discipline required, so magnetic kits demand tighter schedules than natural-seed kits.
One material you will see in every shop is missing here on purpose. Vaccaria seeds — the classic commercial ear seed — along with crystal, glass, and gold- or silver-plated pellets appears nowhere in our book base. This guide therefore makes no claims about them as materials and flags them again in the vendor-spec section below.
Criterion 2 — Tape and Adhesive: The Taping Rules Books Teach
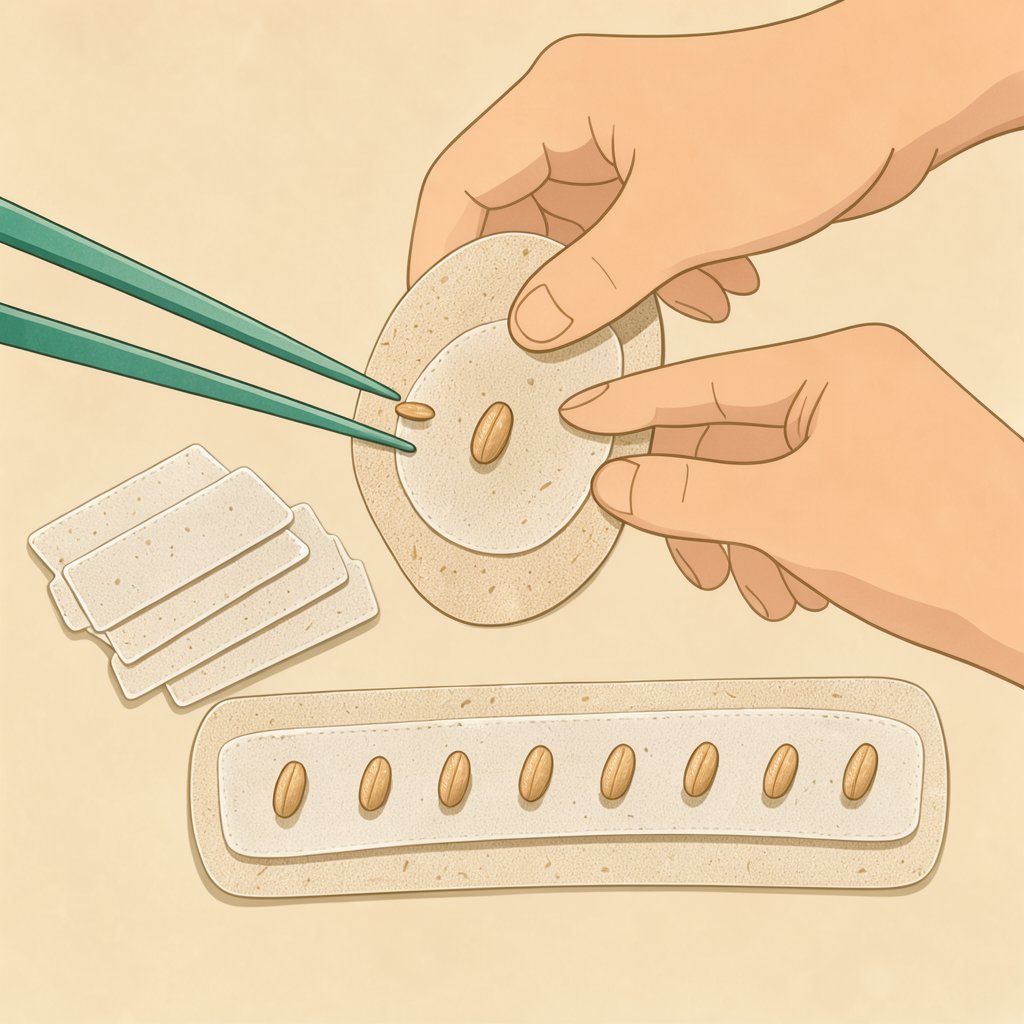
A perfectly chosen seed fails with bad tape, and the tradition wrote exact rules for fixing applicators. In the canonical sequence, the seed is first attached to a small piece of adhesive plaster — paper-based plaster is better — and only then fixed on the skin, with extra plaster strips layered on top “for reliability”[1]. The patch must fully cover the treated correspondence zone rather than sit on a dot; for the spine zone, the books go further and recommend a strip of plaster carrying a whole chain of seeds[1]. One pediatric case even used capsicum (pepper) plaster as a 24-hour continuous stimulant in its own right[1].
Translated into shopping language, the taping rules become four demands on any kit’s adhesive system. Together they decide whether an applicator survives its full wear window:
- Pre-mounted seeds. Seeds should already sit on patches, mirroring the mount-first sequence the books teach[1].
- Paper-based tape. The tradition prefers paper plaster over other plasters for skin contact[1].
- Spare strips in the box. Layering extra strips “for reliability” means a kit without spares runs out mid-course[1].
- Zone-sized patches. Patches must be large enough to cover a whole target zone, not a pinhead[1].
Criterion 3 — Wear Time and Replacement: The Real Value Math
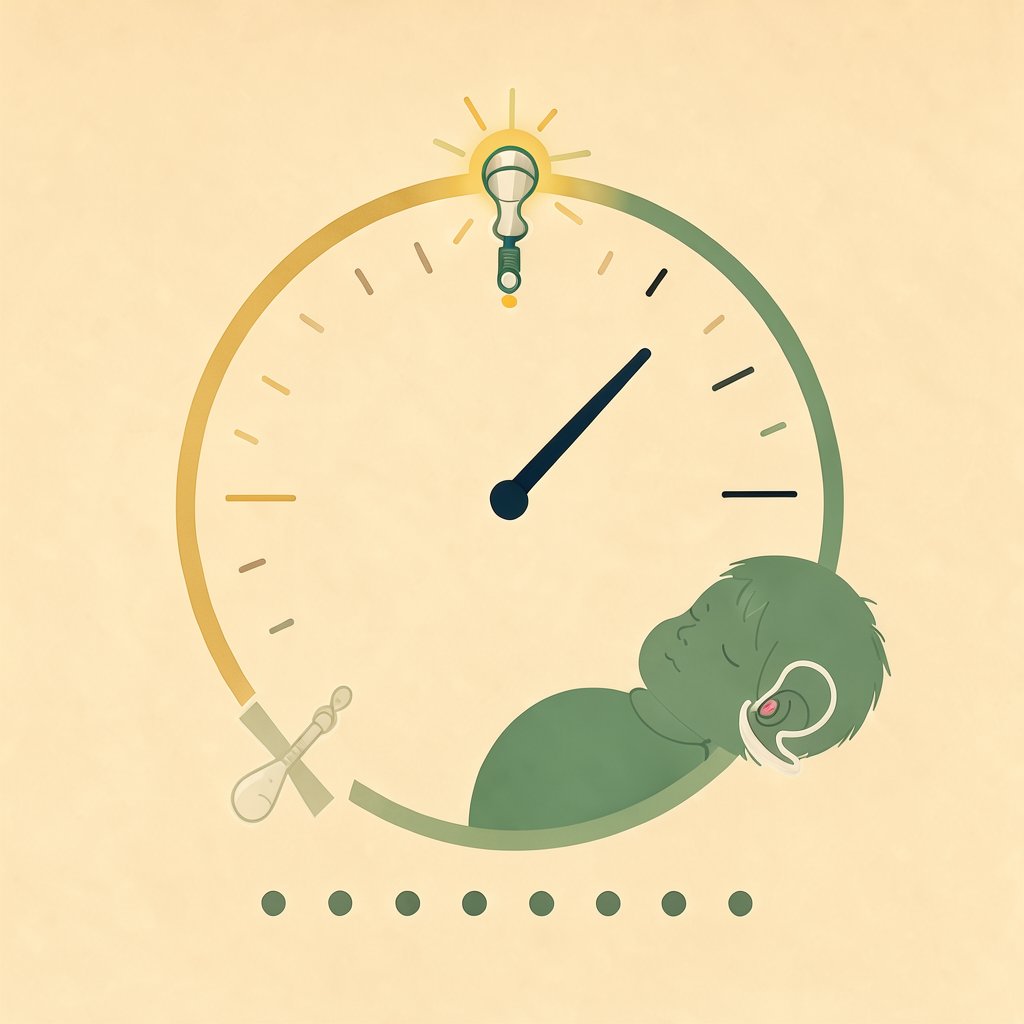
Now the question every buyer asks first: how long does one seed last, and how many will a real course of use consume? The seed-therapy guide is direct — an application runs from several hours up to a day, 24 hours at the outside, after which, if you continue, the seed is replaced with a fresh one; overnight attachment is common, especially for children[1]. The magnetic-star schedule from the cases is stricter at three hours a day for three days, and sixteen-hour continuous wear shows up only under inpatient supervision[1][2].
Use is structured in courses, not one-off applications. The lecture course defines one course as 10 procedures on correspondence points[2], and the case records include a 10-day seed course after which a polyarthritis patient reportedly regained pain-free movement — a traditional case report, quoted as such, not a clinical result[1]. Courses, in other words, are the unit of use the books assume.
Here is the value math, with its label attached: it is our derivation from those numbers, not a figure printed in any book. At up to 24 hours per application and roughly 10 procedures per course, a kit is consumed at about one seed-plus-patch per procedure day, so compare offerings on price per course of use — seeds, patches, and spare strips together — rather than on price per pack or on how large the box looks[1][2].
Criterion 4 — Point Charts and a Probe: Kit Contents That Matter
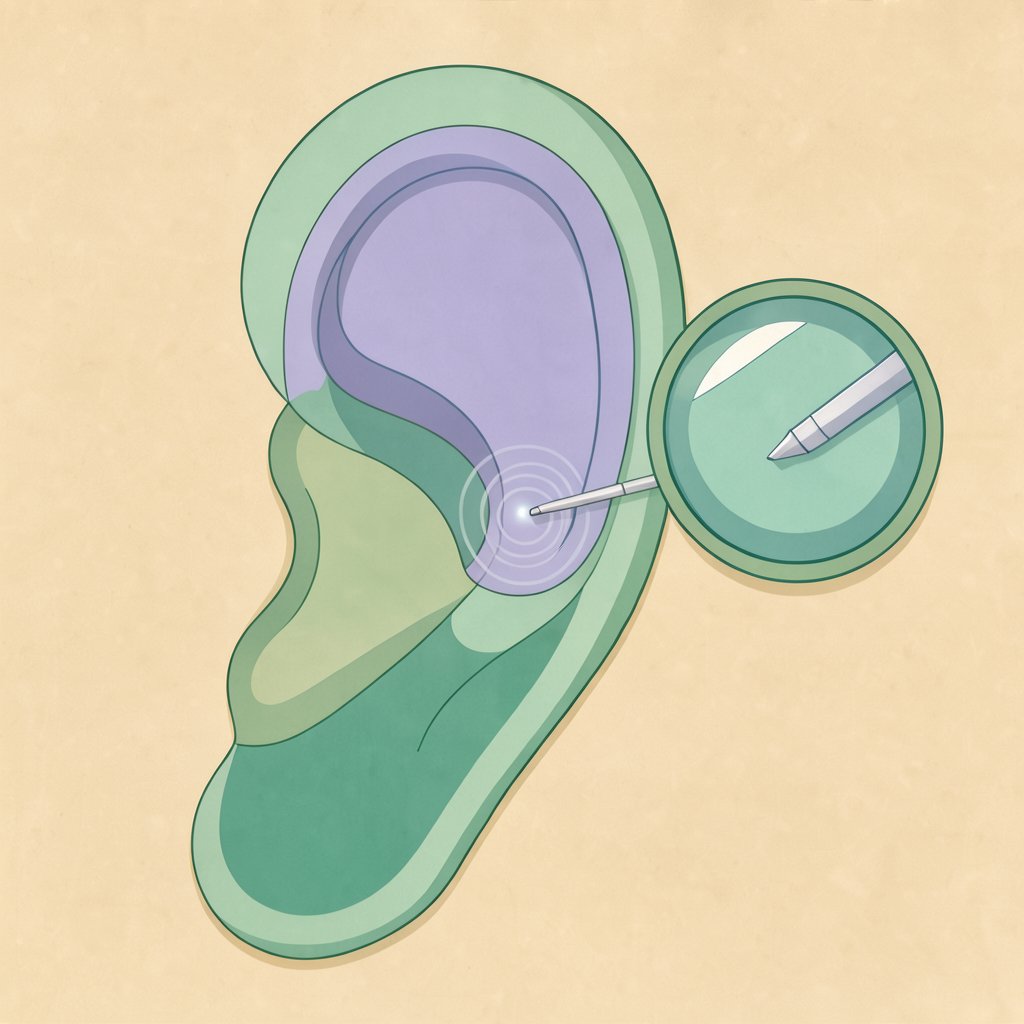
With more than a hundred zones the size of a pen tip on each ear, the difference between a useful kit and a useless one is usually the chart and the probe in the box. The auriculotherapy texts map the auricle in numbered zones — arm and leg, cervical plexus, shoulder and scapula, forearm and elbow, hand and fingers, foot and ankle, knee, hip and lower abdomen, lumbar region — so a kit chart must show real, labeled zones rather than decorative ear art[3]. A pretty diagram without zone names fails the first test of usefulness.
The probe matters just as much. The books locate points with a diagnostic probe or stick pressed with equal, sequential pressure; the tool has genuine diagnostic value in this tradition, and a kit that omits it is asking you to find millimeter-scale targets by guesswork[1]. Verification is equally concrete: pressing a correctly placed seed must cause pain, sometimes with an involuntary motor reaction, and a seed that feels like nothing is sitting in the wrong spot[1].
One honest limit rounds out this criterion. Named auricular points — “Shen Men” and its neighbors — cannot be cited from our source base, because the two dedicated ear atlases in the library never had their text extracted; only the numbered zone map above is citable[3]. The kit checklist follows naturally: a labeled zone chart, a probe, and tweezers beat branded packaging every single time.
Criterion 5 — Safety Filters: Materials and Health Contraindications
The final filter protects both your skin and your wallet, and the books are blunt about materials. Never use seeds that irritate the skin, seeds of poisonous plants, or seeds that cause allergic reactions; do not collect seeds near roads, where they take up heavy-metal salts; and never use chemically treated planting stock[1]. For a buyer this compresses into one demand: a kit must disclose what its applicators are made of and what coating they carry.
Health conditions rule the method out entirely in a long list from the auriculotherapy guide: acute inflammation, bleeding, overexcitement or fatigue after heavy exertion, fever, purulent wounds, eczema, boils, skin rashes, thrombosis and varicose veins, cancer, and inflamed lymph nodes — and the technique itself must avoid excessive friction, which causes redness and irritation[3]. Pregnancy has its own line: the obstetrics reference lists reflexotherapy as contraindicated in the second half of pregnancy, and the field has historically avoided it in pregnancy overall[6].
Positioning, honestly: the method’s author calls seed therapy effective and safe and usable at home for first-aid self-care — that is his claim, quoted as such, not a medical assessment[1]. Nothing on this page is medical advice. If you live with anything on the list above, are pregnant, or take prescription medication, ask a qualified provider before taping anything to your ears.

How to Apply an Ear Seed: The Applicator Method, Step by Step
Kit chosen and safety filters passed — here is the application routine itself, with one honesty label up front. The seed protocols in our source books are written for the Su Jok system’s correspondence zones on the hands and feet, so what follows is that same school’s seed-applicator method, reconstructed rule by rule — not an ear-specific protocol, which the books do not provide[1]. The ear-specific complement from the auriculotherapy guide, a manual massage, closes the section.
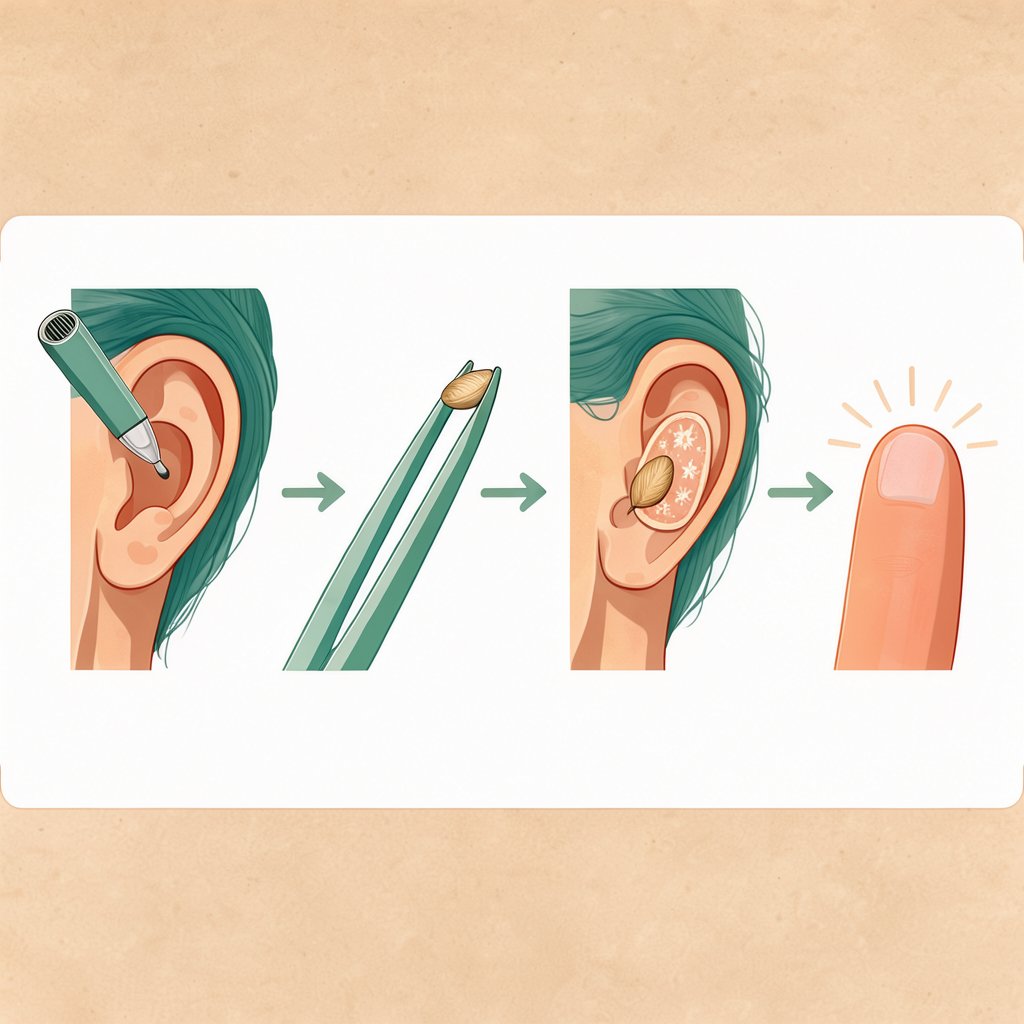
Step 1 — Find the point with a probe
Work with a diagnostic probe or a blunt stick, pressing candidate zones with equal, sequential pressure rather than poking at random. The tradition reads the most tender spot under even pressure as the target, which is exactly why a probe belongs in every kit. On the ear, expect targets about a millimeter across, so take your time and compare neighboring zones before committing.
Step 2 — Mount the seed on tape first
Attach the seed to a small piece of adhesive plaster before it ever touches skin — paper-based plaster is the books’ preference — so the applicator is assembled on the patch, not on your ear. This mount-first order is the canonical sequence. Pre-mounted kit patches simply automate the same step.
Step 3 — Fix the patch over the whole zone
Place the mounted seed so the patch covers the entire target zone, not just the point, and layer an extra plaster strip on top for reliability. For elongated zones the books use a longer strip of plaster carrying a chain of seeds rather than one isolated dot. Press lightly to seat the adhesive, then move to verification.
Step 4 — Verify with a press
Press the applied seed. A correctly placed one must cause sharp tenderness, sometimes with an involuntary motor reaction — a wince or head tilt you did not plan[1]. A seed that feels neutral is misplaced, so lift and re-seat it rather than wearing it through the session.
Step 5 — Wear, then replace within 24 hours
Wear the application from several hours up to a full day, after which it comes off and, if you continue, is replaced with a fresh seed rather than reused[1]. Overnight attachment is the books’ norm for children. Adhesive quality is what decides whether the applicator actually survives its window.
Step 6 — Structure use as a course
Repeat across a structured course of about 10 procedures rather than a single session, following the lecture course’s definition of a course on correspondence points[2]. Track your days and replacements in a note or calendar. The wear-time arithmetic above tells you what a full course consumes, so you will know when the kit is running low.
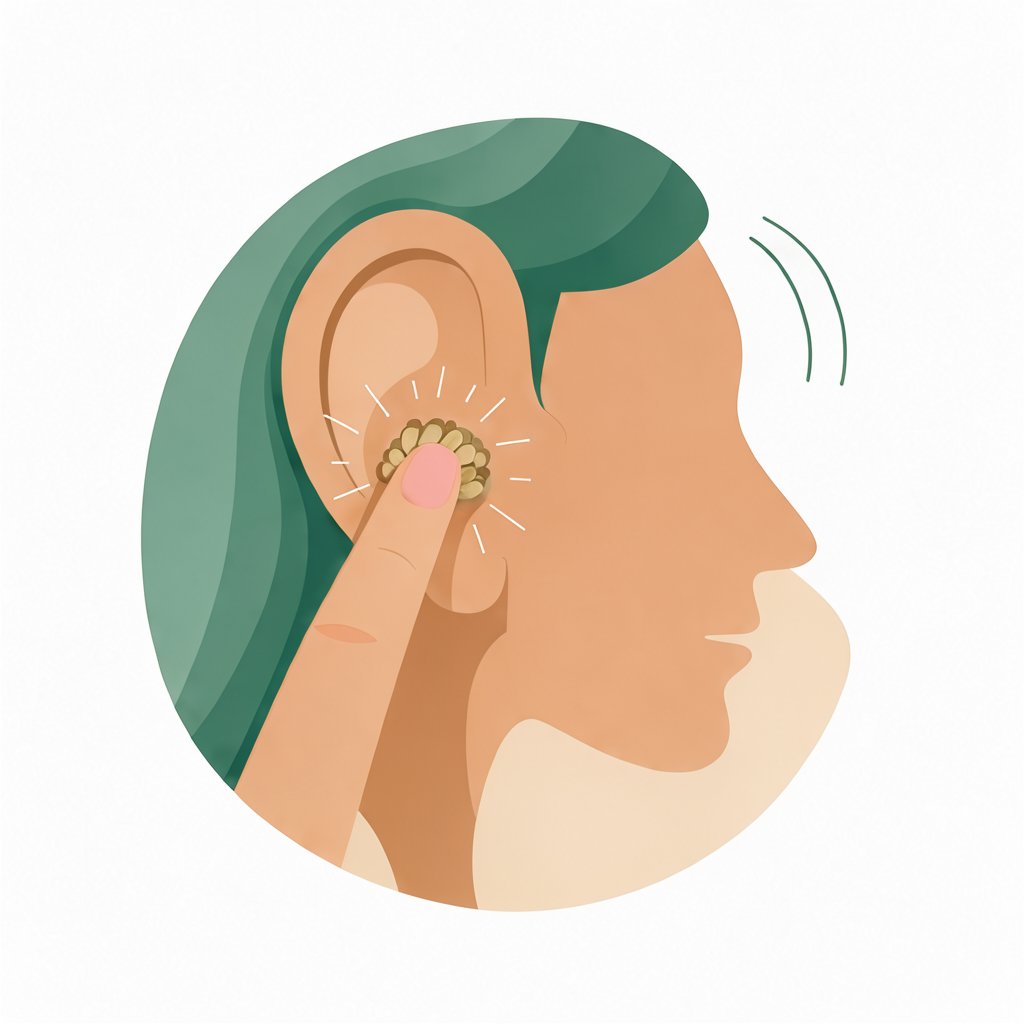
For the ear itself, the auriculotherapy guide adds a manual technique any kit user can pair with seeding. Set the thumb in front of the auricle and the index finger behind, work with circular friction and periodic pressure, start at the earlobe and finish at the top of the helix, then close with two or three light strokes and a 10-minute rest[3]. The same author’s separate self-help routine — three minutes of gentle finger rotation inside the ear openings — is described in the tradition for blood-pressure care in hypertension and appears here strictly as traditional use[3].
Why This Guide Doesn’t Rank Brands: The Vendor-Spec Gap
A buyer’s guide usually ends with a podium of brands; this one ends with a disclosure, because the source library has no product layer to rank from. Our 1,137-book base contains no ear-seed kit brands, prices, bundle contents, adhesive comparisons, or value ratings — the buyer’s-guide category query returned supplement catalogs and critical guides instead, with relevance scores near zero. “Vaccaria” appears nowhere in the base, named points such as “Shen Men” are not citable, and crystal, glass, and plated pellets as product classes are simply not covered.
So this guide ranks criteria, not brands. The practice rules above compress into a vendor-spec checklist you can run against any product page:
- Material disclosed. What the applicators are made of, and what coating they carry[1].
- Tape up to standard. Paper-based patches, pre-mounted seeds, spare strips in the box[1].
- Tools included. A labeled zone chart, a probe, and tweezers[1][3].
- Sane replacement schedule. Instructions compatible with the 24-hour replacement rule[1].
- Allergen transparency. An explicit statement on allergens and coatings, per the material safety rules[1].
While this cluster has no ear-seed offers to review yet, we do track two adjacent self-care options with full editorial reviews — see our Joint Genesis review and Unlock Your Hip Flexors review, or jump straight to the current offers: Joint Genesis and Unlock Your Hip Flexors. Their spec sheets are vendor claims and are labeled as such on the review pages. Disclosure: we may earn a commission if you buy through links on this page; ratings and recommendations remain our editorial opinion.
Frequently Asked Questions
How long do ear seeds stay on?
An application runs from several hours up to a day — 24 hours at the outside — after which the seed comes off and, if you are continuing, is replaced with a fresh one rather than reused. The replacement ceiling is the books’ own dosage rule, and it is what makes the price-per-course math work. (Park Jae Woo — Su Jok Seed Therapy)
Can you sleep with ear seeds in place?
Yes — overnight attachment is the documented norm, especially for children, because it covers a long stimulation window without daytime effort. Adhesive quality decides whether the patch survives the night, which is why tape is a buying criterion of its own. (Park Jae Woo — Su Jok Seed Therapy)
Are ear seeds safe to use at home?
The method’s author positions seed therapy as safe for home first-aid self-care, and that is his claim, quoted as such. The contraindication list still applies in full: fever, acute inflammation, inflamed or broken skin, eczema and boils, thrombosis and varicose veins, cancer, inflamed lymph nodes, and the second half of pregnancy all say skip it. (Park Jae Woo; Ermakova S.O.)
What are ear seeds made of?
Two documented classes exist: natural seeds chosen by the shape tradition — pea and black pepper for the eyes, beans for the kidneys, buckwheat and pumpkin for the heart — and metal or magnetic stars with stricter wear windows. Shop staples such as vaccaria and crystal sit outside what the source base covers. (Park Jae Woo — Su Jok Seed Therapy)
Can I use ear seeds during pregnancy?
The obstetrics reference lists reflexotherapy as contraindicated in the second half of pregnancy, and the field has historically avoided it in pregnancy overall because of miscarriage concerns. If you are pregnant or planning to be, consider that a hard stop and ask your provider about alternatives. (Reflexotherapy in Obstetrics and Gynecology)
Do ear seeds actually work?
The honest answer is that the mechanism debate is unsettled: gate control, endorphin release, and placebo are the three standing explanations for acupuncture-style analgesia, and reliable data are lacking for each. The vagus nerve’s auricular branch is real anatomy, but the evidence layer for seeds specifically is thin. Buy on criteria and comfort, not promised outcomes. (Singh S., Ernst E.; Habib N.)
That is the whole method of choosing. The best acupressure ear seeds are the ones whose material class matches the wear schedule you can actually keep, whose tape follows the mount-first, full-zone rules, and whose box includes the chart, the probe, and the honesty to disclose what the seeds are made of. Run any ear seed kit — or any “best ear seeds 2026” listicle — through the five criteria above before you spend a dollar. A kit that passes all five is a good kit, whatever the brand on the box happens to be.
Sources
- [1] Park Jae Woo — Su Jok Seed Therapy: the shape-tradition guide to seed materials, the canonical taping sequence, the 24-hour wear-and-replace rule, point-finding with a probe, and the material safety rules cited throughout this buyer’s guide.
- [2] Park Jae Woo — Lectures on Su Jok Therapy, Part 1 (1998): the case-based lecture course supplying the magnetic-star wear windows, the sixteen-hour inpatient case, and the ten-procedure course structure used in the value arithmetic above.
- [3] Ermakova S.O. — Head and Auricle Massage: the Path to Health and Longevity (2010): auriculotherapy basics with the numbered one-to-eleven zone map, the manual ear-massage protocol, and the contraindication list for work on the auricle.
- [4] Habib N. — Vagus Nerve (2021, English translation layer): the auricular branch anatomy reaching the outer canal, tragus, and concha, plus the twenty-versus-eighty percent efferent and afferent fiber split; the extracted text is a partial, rough machine translation.
- [5] Singh S., Ernst E. — Trick or Treatment (Russian edition, 2017): the critical history of acupuncture, from Berlioz’s nerve-and-electricity reinterpretation to the gate-control, endorphin, and placebo explanations, each still lacking reliable supporting data.
- [6] Reflexotherapy in Obstetrics and Gynecology — author not stated in the source metadata: the reference text supplying the pregnancy contraindication for reflexotherapy in the second half of pregnancy.
Where to go next: inside the acupressure silo, our Zusanli (ST36) acupressure manual teaches the same point-pressure logic on the leg, and the Tui Na self-massage manual covers the hands-on counterpart for the whole body. Both follow the same book-first, no-promises method as this guide. If the nervous-system angle is what drew you in, pair this read with our slow-breathing vagus reset practice.
How we researched this: built from a local library of 1,137 wellness books, queried through an offline retrieval system with no internet sources used at any point. Every factual statement above carries a numbered citation to the book it came from, and the gaps — vaccaria, named points, product data — are declared rather than papered over. Where arithmetic was derived, as in the price-per-course math, it is labeled as our own derivation from the cited numbers.
